

FAQ
Here you will find answers to frequently asked questions
Questions on the netScope® portal
Help with registration, user accounts and administration

Each netScope Viewer, Desk, Group or Server installation requires a valid netScope Portal account/registration to assign the licenses.
Visit our website and click on SIGN UP in the menu bar. You will be redirected to the netScope®portal.
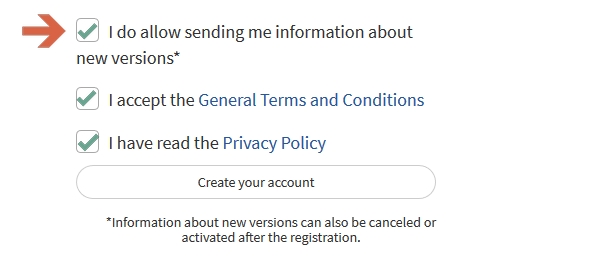
Please register here with a valid email address and accept the general terms and conditions as well as the privacy policy.
Information about version updates is optional, we recommend to tick this box. You will not receive any advertising.
For registration you can also watch this Youtube video.
We constantly work on refining and further developing our software. Version updates containing new features and improvements are regularly released, which will simplify your workflow and save you time.
You will not receive junk mail!

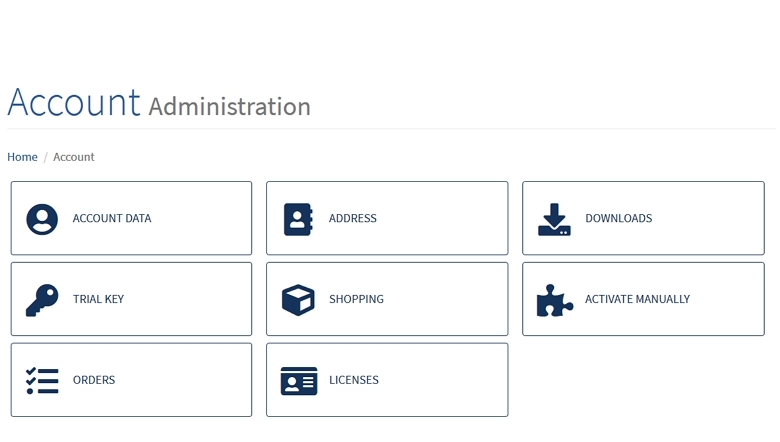
After registration please check your e-mails (including spam folder, if necessary) and confirm your e-mail address. Afterwards log in to the netScope®portal. You will be directed to the account administration page.
For now, you do not have to do anything else. To get a license as associate of an organization (e.g. university), please contact the administrator of your organization.
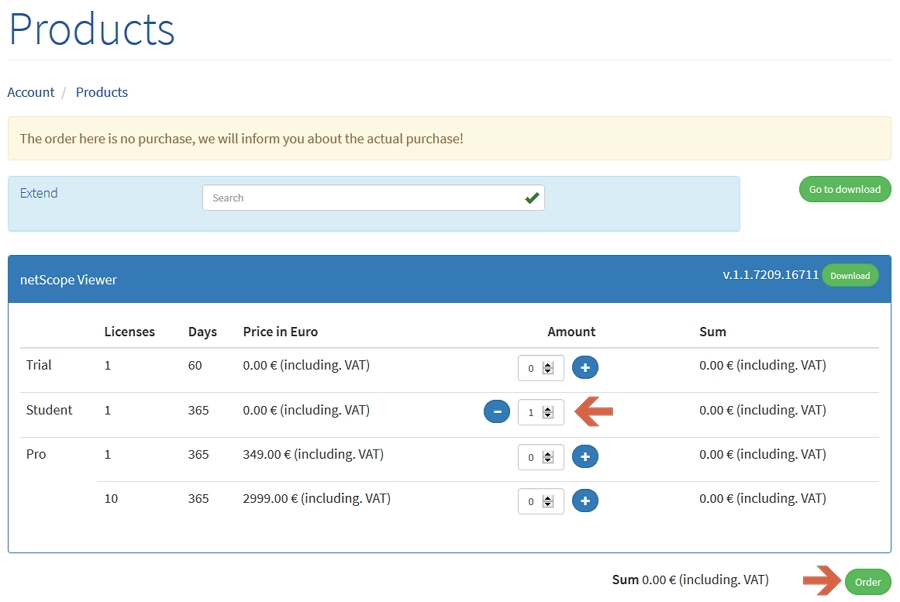
Under “address” you can create a private customer or a company account. This is only necessary if you want to purchase licenses as an administrator for your organization or as an individual.
No. You don’t need to do this immediately. You will be asked to enter your customer data when you place your first order.
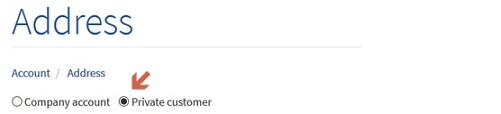
If you want to purchase a license as an individual (e.g. student), please select “private customer account” and enter your address data.
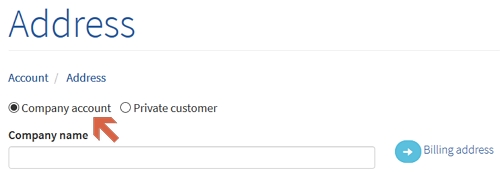
If you want your organization (e.g. university) to be the customer, please select “company account” and enter address data, tax ID and deviating invoice address where required.
As creator of a company account you are administrator of your organization by default. You can purchase and manage licenses as well as assign administrator rights to other members of your organization.
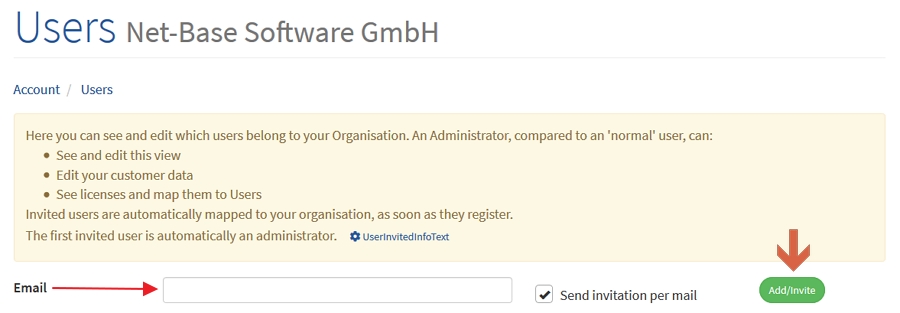
Go to the account administration page and select „users in your organization”. By entering the e-mail address of the new user, he will be added to your company. The e-mail address must be identical with the address with which the new user has registered in the portal or will register (via the invitation link).
Take a look at this Youtube video.
Technical Questions
Help with the installation, features and compatibility of netScope®
netScope® Viewer works with the following common operating systems: Windows 7 Sp.1, Windows 8, Windows 8.1, Windows 10 and Windows 11.
Under Mac OS and other Unix systems it is possible to use netScope Viewer with Crossover (unfortunately not for czi files).
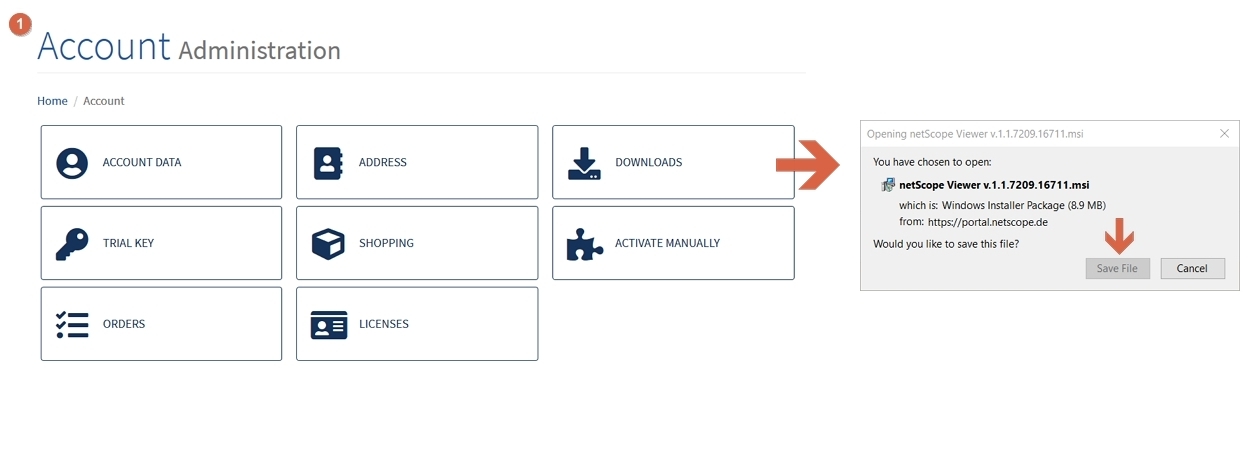
After login, the installation files can be found on our website. Please choose the latest software version. After downloading, run the installation file which will guide you through the installation process.
In case of a security warning, you might have to temporarily disable the antivirus program or having to add a security exception for the software.
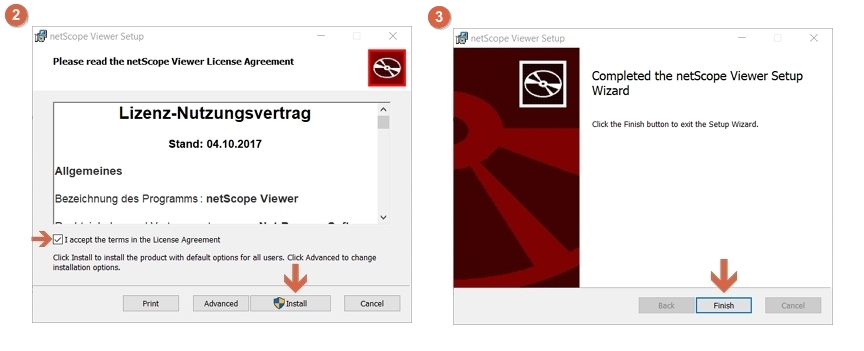
Please read the terms and conditions of the licence agreement, accept and confirm by clicking “install”. (If you don’t have administration rights, please follow the instructions given here → (202) ). After successfully installing netScope®, click on “Finish” to open the program. Then follow the instructions on how to activate your netScope® license → (203).
In case of any technical question, please contact our customer support at: info(at)netScope.de
Take a look at this Youtube video.
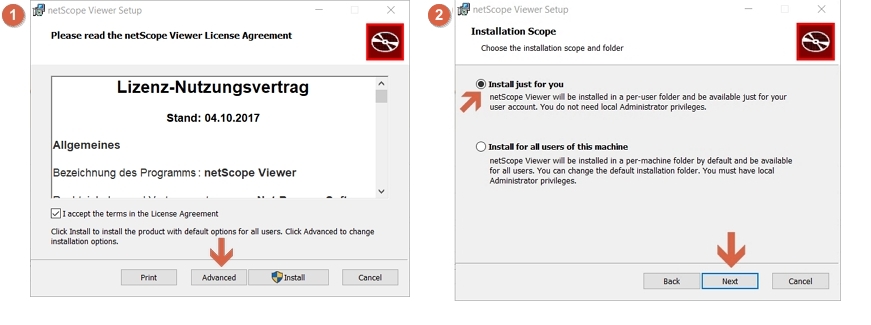
In order to install netScope® on your computer without having administration rights, you need to choose “Extended” after agreeing to the license agreement. On the following page click "Install just for me” and confirm by clicking “Next” and “Install”.

If the activation window does not open, please proceed as follow. Click “help”, “current licence”, “activate”. (To register a new licence, please first delete the previous old one).
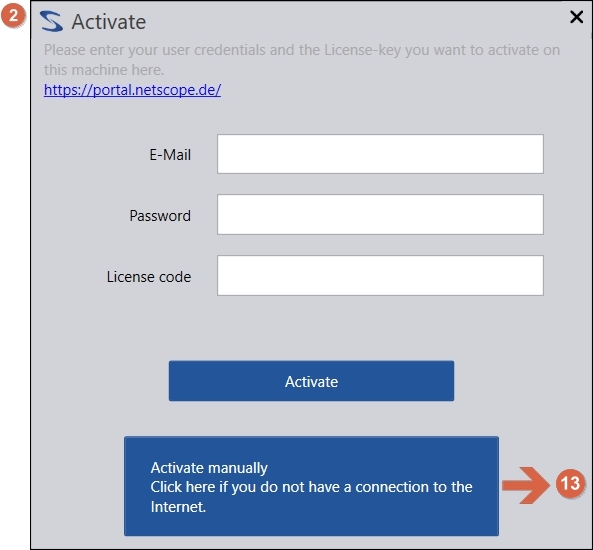
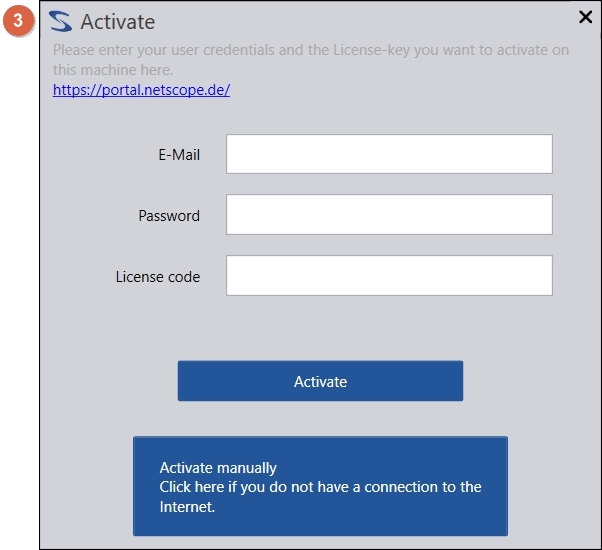
After opening the activation window, first enter your login as well as your licence key for your personal access area. A provisional key has been sent to you by email, which might also be available on our homepage under “ how to find my personal licence key”. Click to activate your license. If this link is not working properly, alternatively you can activate your license manually.
Take a look at this Youtube video.

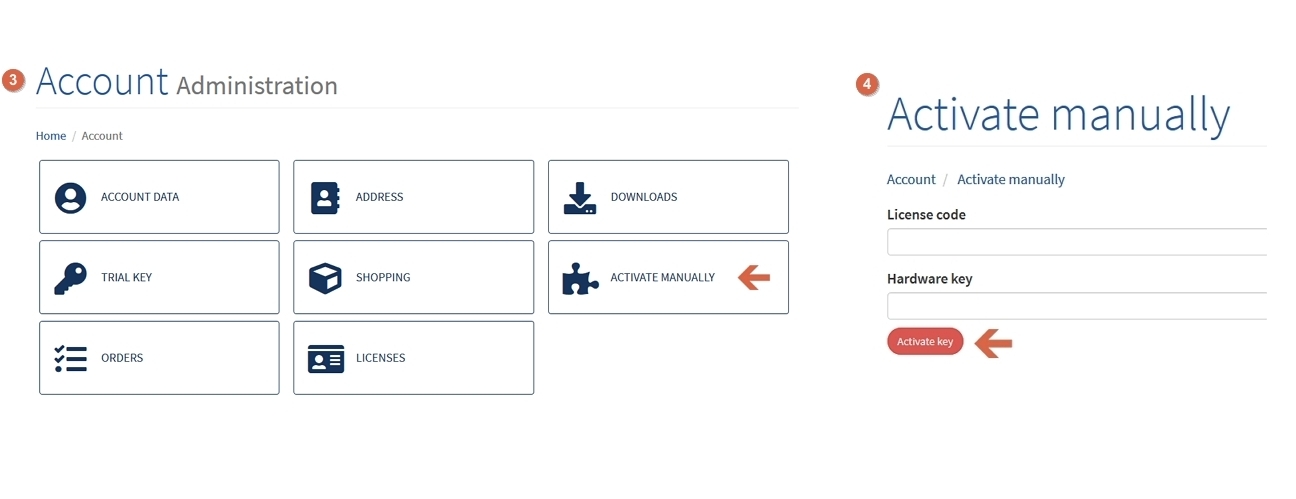
You can also activate your licence without an internet connection. Just connect to our website with another device and log in to your personal account, in order to see your available licenses (click here → (303) on how to find your license). Click “activate” in order to activate the license on your Computer. Now a Hardware key is required, which you receive by clicking “activate manually”.
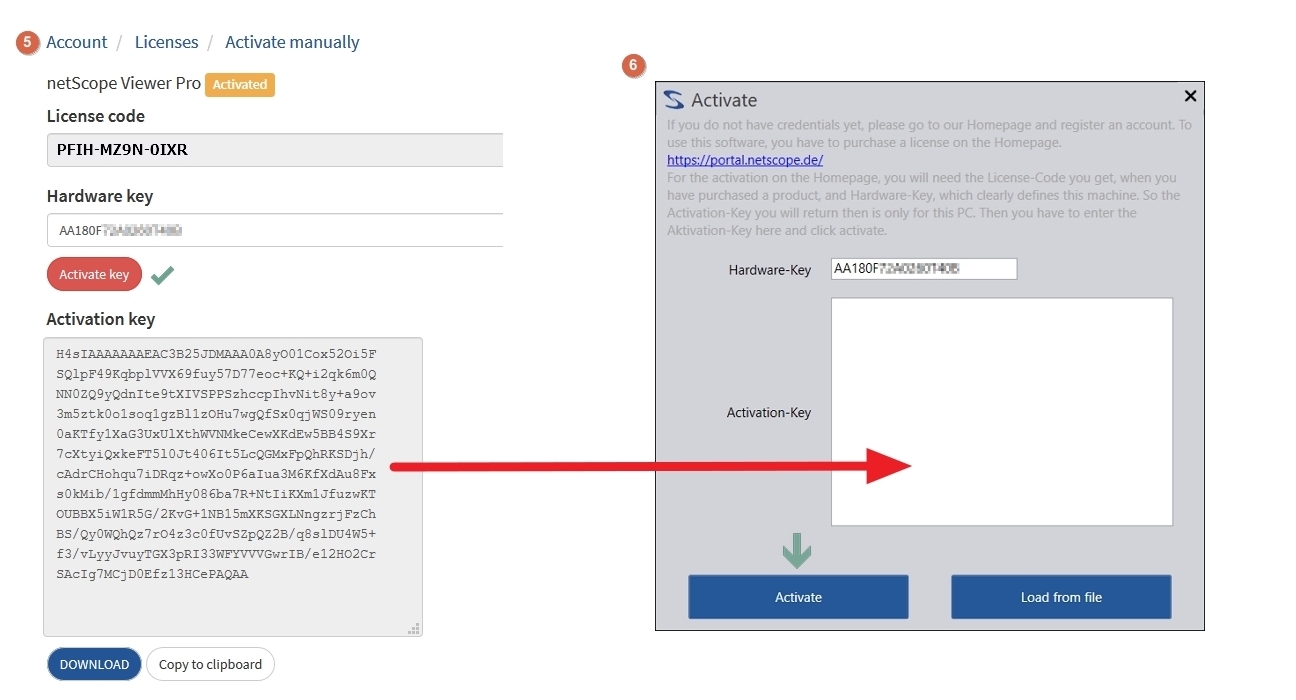
Click “activate key” and on the following page “activate”. Now you have received an activation key, which you may copy and paste into netScope.
If the license code is not linked to any specific person, please choose “activate manually” here. Here you may enter your license code and hardware key.
Take a look at this Youtube video.
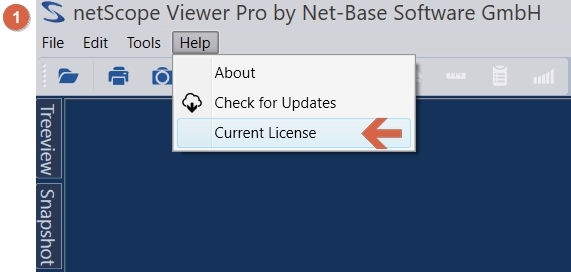

(1) Click on "Help
(2) 'Current licence'. Your previous (demo) license will be displayed. Select "Delete".
(3) The activation window appears. Now you can register your new license.
netScope® can process files of the formats CZI and ZVI from Zeiss, MRXS from 3D Histech, PerkinElmer Vectra QPTIFF, Vantana BIF, Sakura Virtual Slide SVSLIDE, NanoZoomer VMS and VMU, SVS from Aperio and SCN from Leica. Furthermore, common image formats such as TIFF, TIF, JPEG, JPG, PNG, GIF are supported. ImageScope annotations in XML format are also supported. More formats will follow in the future.
You can export slides in the following formats: JPEG, BMP, GIF, TIFF, Big Tiff and PNG.
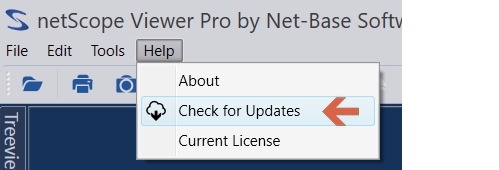
netScope® Viewer automatically searches for updates once daily. If an update is available, it is offered for download. However, you will only receive updates as long as the license is valid.
netScope® viewer does not set any limits in terms of resolution or file size
The capability is therefore only limited by your system.
netScope® Viewer works with all aspect ratios i.e. 4:3, 16:9, 16:10 and whether or not user defined. The Viewer also does not set limits on screen resolution. However, it is important to note that the program can slow down using digital images at higher resolution since this requires processing larger amounts of data.
In this case, please contact us info@netscope.de.
We will then get in touch with the manufacturer and ask to unlock our software.
If you need immediate access, you can ignore the antivirus program warning and continue with the installation. In this case you might have to temporarily disable your antivirus program or having to add a security exception for the software. As this process works differently for each program you may contact their help desk for further assistance.
netScope® Viewer is tested free of any malware and signed with a certificate of the Net-Base Software GmbH.
Questions about the license
If you purchase a netScope license, it is valid for one year and limited to one device.
After the license expires, you can continue to use the program, but you will not receive updates any longer.

Yes, you can download the trial version here. This version is valid for 60 days. After that, you will still be able to use it, but you no longer have all functions available.
Yes. There is a free student license, which is valid for one year. In order to get a license, you need to send us your current certificate of study as PDF.
Please request your free student license here.

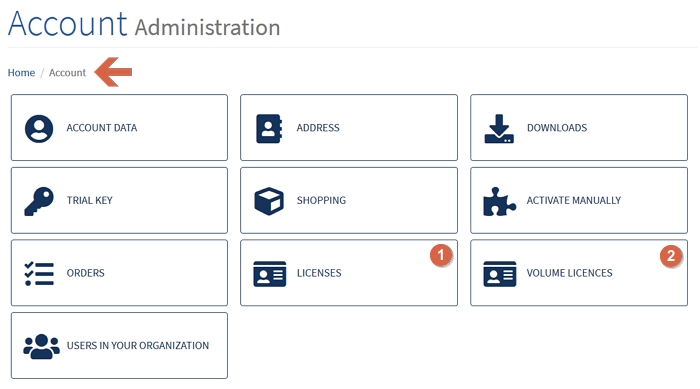
You can find your personal license on our homepage, by clicking on your name in the top right corner. Here you can find your "Licenses" (1), alternatively you may find “Volume Licenses” (2), those are the licenses assigned to your organization.
Questions on software usage
Help on operating netScope®
Program features automatically save all changes you have made so there is no need to do so manually. You can revert to your work as it was when you last opened it whenever you need to.
netScope® Viewer supports CZI and ZVI from Zeiss, MRXS from 3D Histech and SVS from Aperio. If your previous slides are in one of those formats transfer will work.
Move the pointer to the edge of the sidebar. A double-sided arrow will appear, which you can use to adjust the width. Adjustments will be saved automatically and the set width will be used when you start the program again.
The magnification factor of the netScope® Viewer is determined by the technical limitations of your slides and the system you use, and you can zoom in as far as the slides will allow.
Default settings are at a 40 fold magnification (400%). Please note that zoom levels of more than 10-fold are extrapolated views that become more inaccurate.
If you have several slides open you can view them side by side clicking and holding the name of the slides with the mouse pointer. The program now gives you the option of placing the slide where you want it.
To process slides simultaneously, please use the linking function. This allows you to connect the slides and change the views at the same time (zoom, rotation, image section etc.).
Yes. This can be accomplished in the list view of the selection menu. Here you can assess and comment on the slides. You can change the view in the upper right corner of the menu.
Annotations can also be placed directly on the slide by using the respective annotation tool. Choose freely between rectangular and elliptical shapes as well as lines, dots and arrows or draw freehand.
Moreover, you can annotate anywhere you want.
Measurement is carried out via the annotation function.
The program automatically determines the distance of two points and for rectangles and elliptical shapes the height and width.
With fluorescence slides, you can adjust the chromatic values for each channel individually or all of them at the same time as well as enabling or disabling them. You can also change pseudo-colors, black and white as well as gamma levels.
Please choose histogram from the toolbar.
After moving the pointer over the histogram three gray icons will appear on the right hand side. The one on the top allows you to load previously saved settings, the middle one is used to save current settings.
However, you can also import already existing slide settings – Zeiss Efficient Navigation (ZEN) display settings (.czdsp) and netScope® display settings (.chs).
Using the Z-Stack function, the netScope® Viewer will display changes over time only if this function is supported by the slide used.
The T-Stack function enables you to depict temporal changes over time within a single slide instead of a video. However, this function must be supported by the slide.
If you want to cite the netScope Viewer in your work, we offer you two options here, each for the latest version.
BibTeX
You should use \bibliographystyle{plainurl} to output the url for reference.
Normal
Any questions left?
☏ ✉
Please do not hesitate to contact us via our support form.